3D Printing
Autodarts provides 3D models for the Winmau Plasma Light. The Winmau Plasma light has the advantage that the three wall mounts are exactly 120 degrees apart. We can use the original holes to mount a camera arm to the Winmau Plasma light.
Autodarts does provide 3D models for an entire LED ring to print.
NoteYou also can search for printable files on Cults3d and Thingiverse.
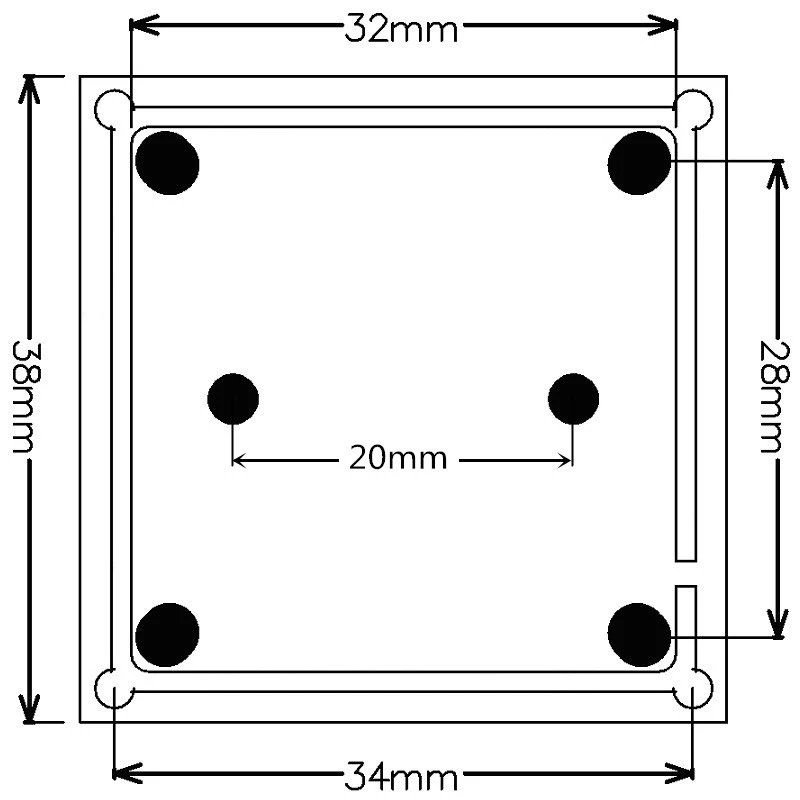
Camera modules come in differnet formats. The most common formats are 38x38mm (with holes at 34x34mm) and 32x32mm (with holes at 28x28mm). Sometimes camera modules feature both formats and you can clip off the outer rims to make a 32x32mm module from the 38x38mm original.
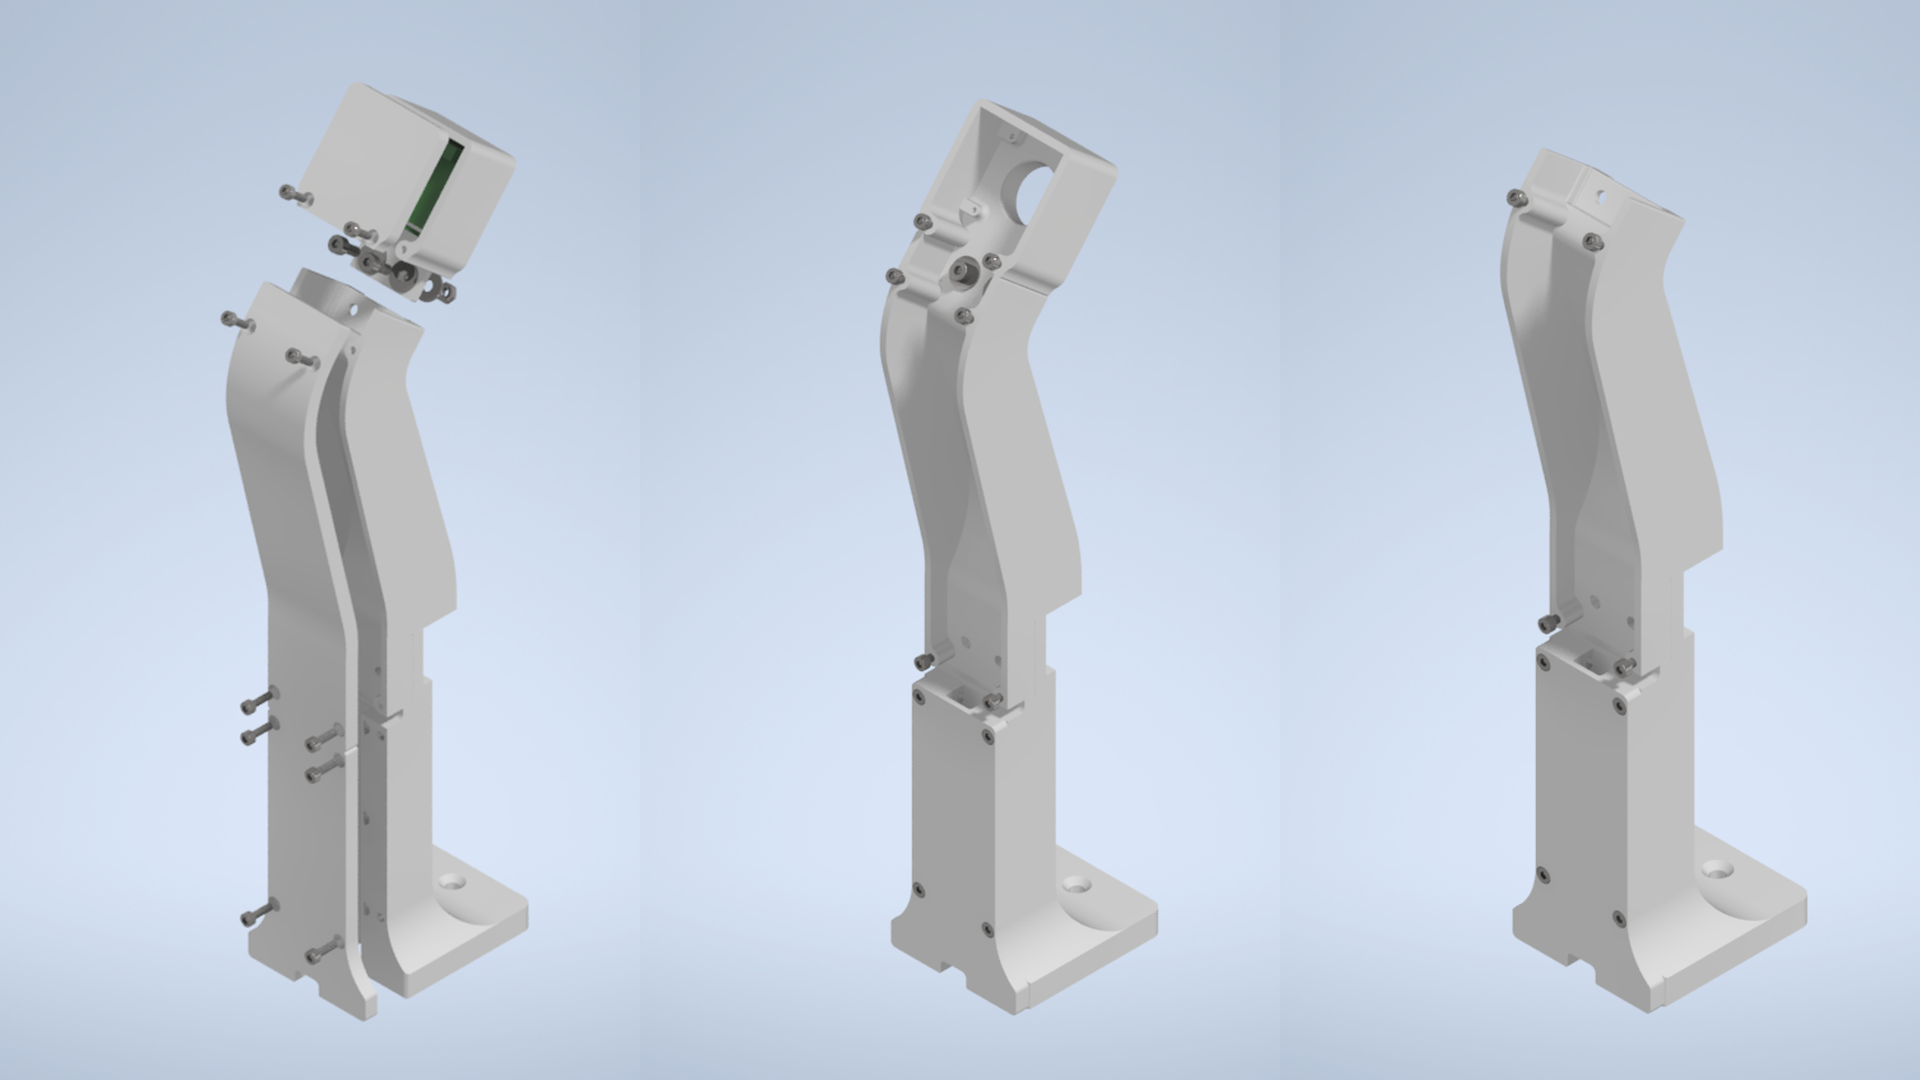
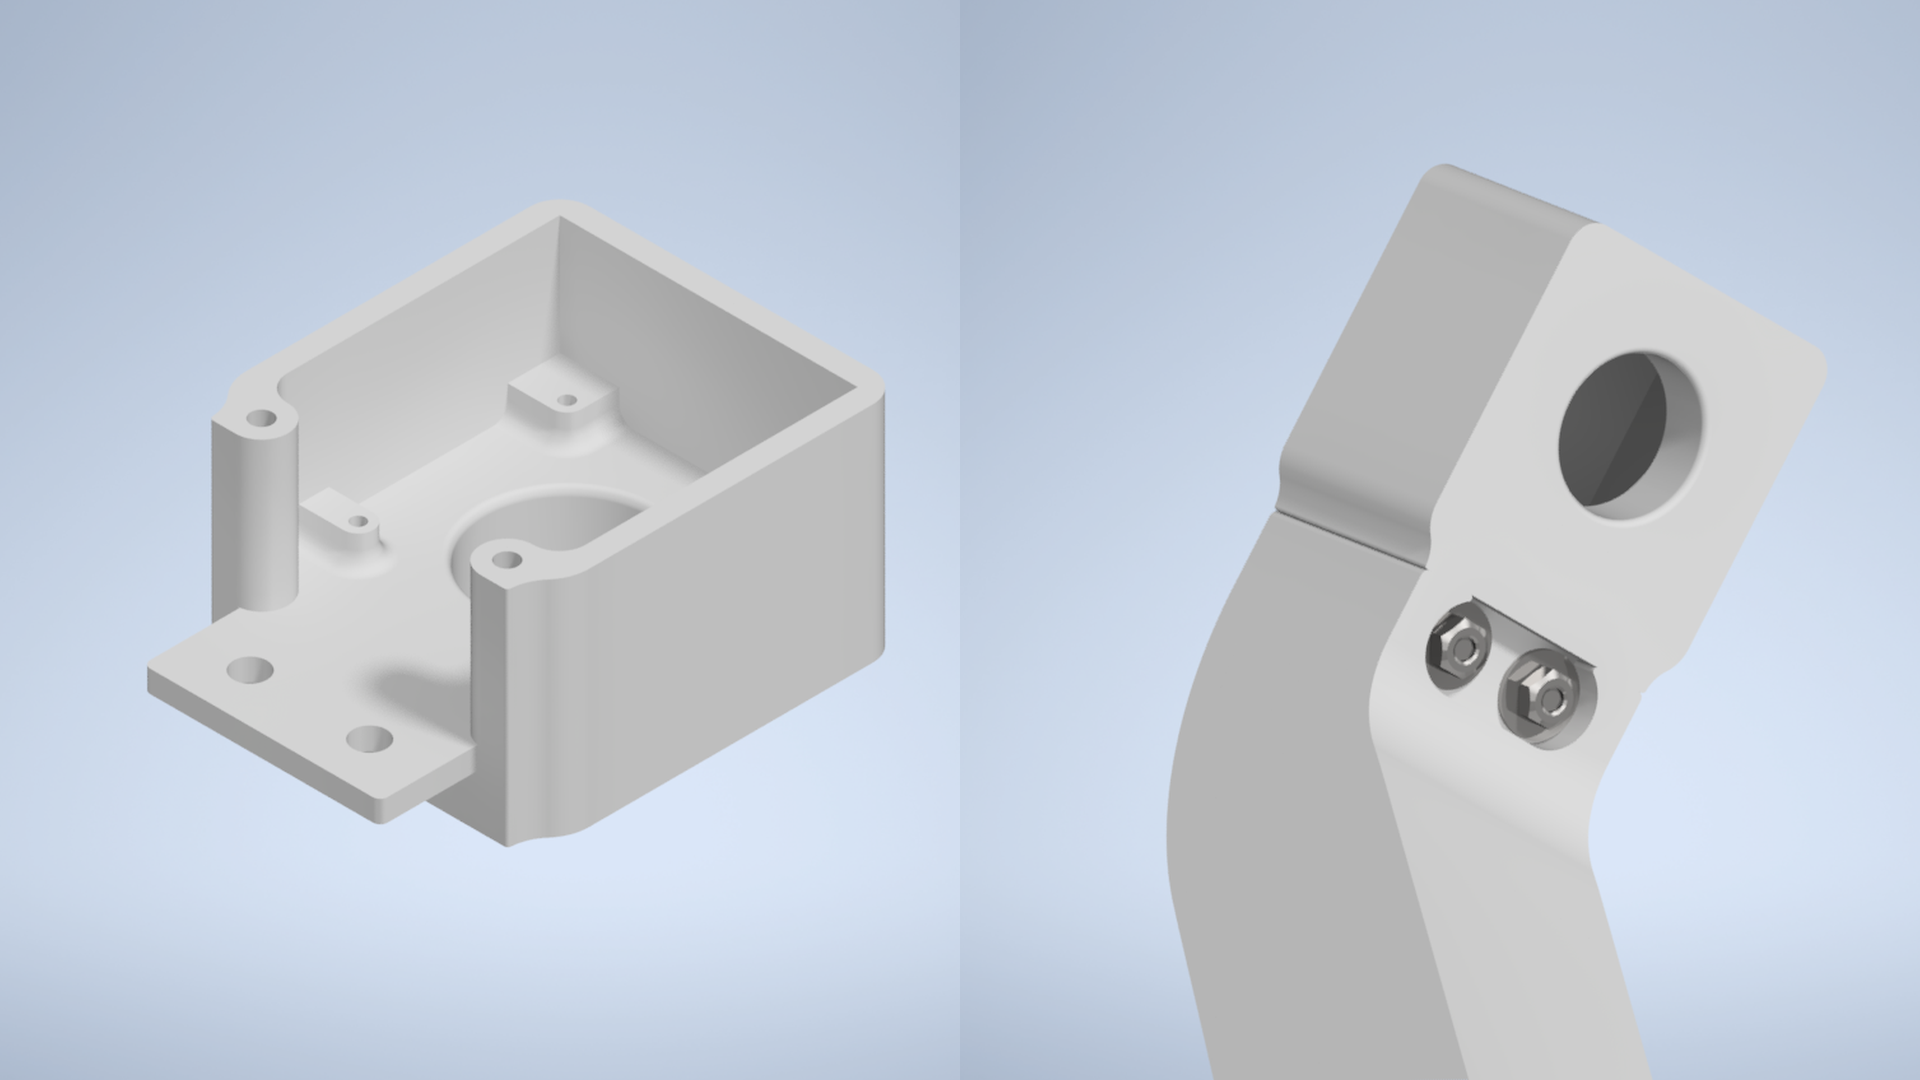
Autodarts provides whole arms for 32x32mm modules (or 38x38mm modules with removable rims). Autodarts also provides modular arms that can be connected to different heads. In case your camera module does not have removable rims, there is a modular head for 38x38mm modules.
There is also an option to use regular webcams if they feature a standard camera mount thread in their base.
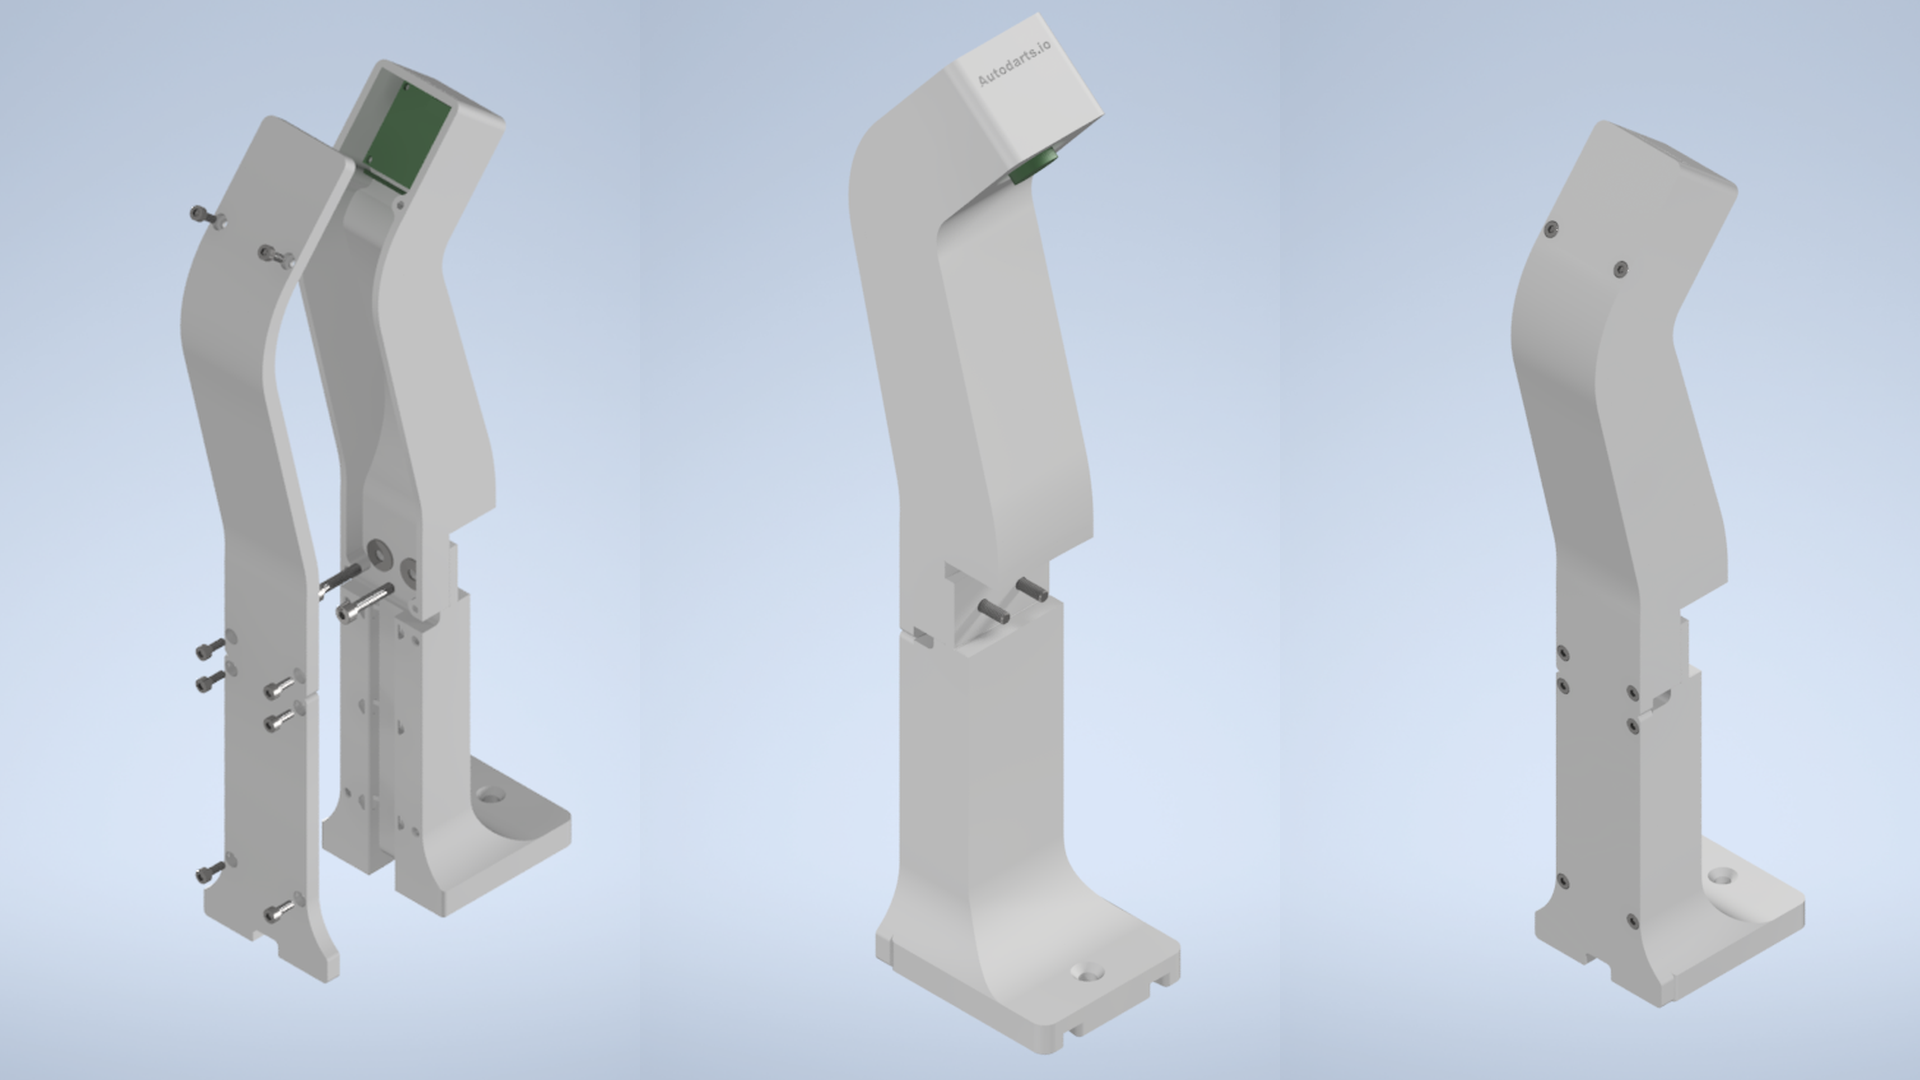
If you have a Winmau Plamsa Light setup at home, you can simply print three camera arms. Alternatively, you can also print new feet for the Winmau Plasma Light. A finished Winmau Plasma Light setup may look like this.
Which camera arms you need depends on the type of camera that you want to mount. There are multiple options.
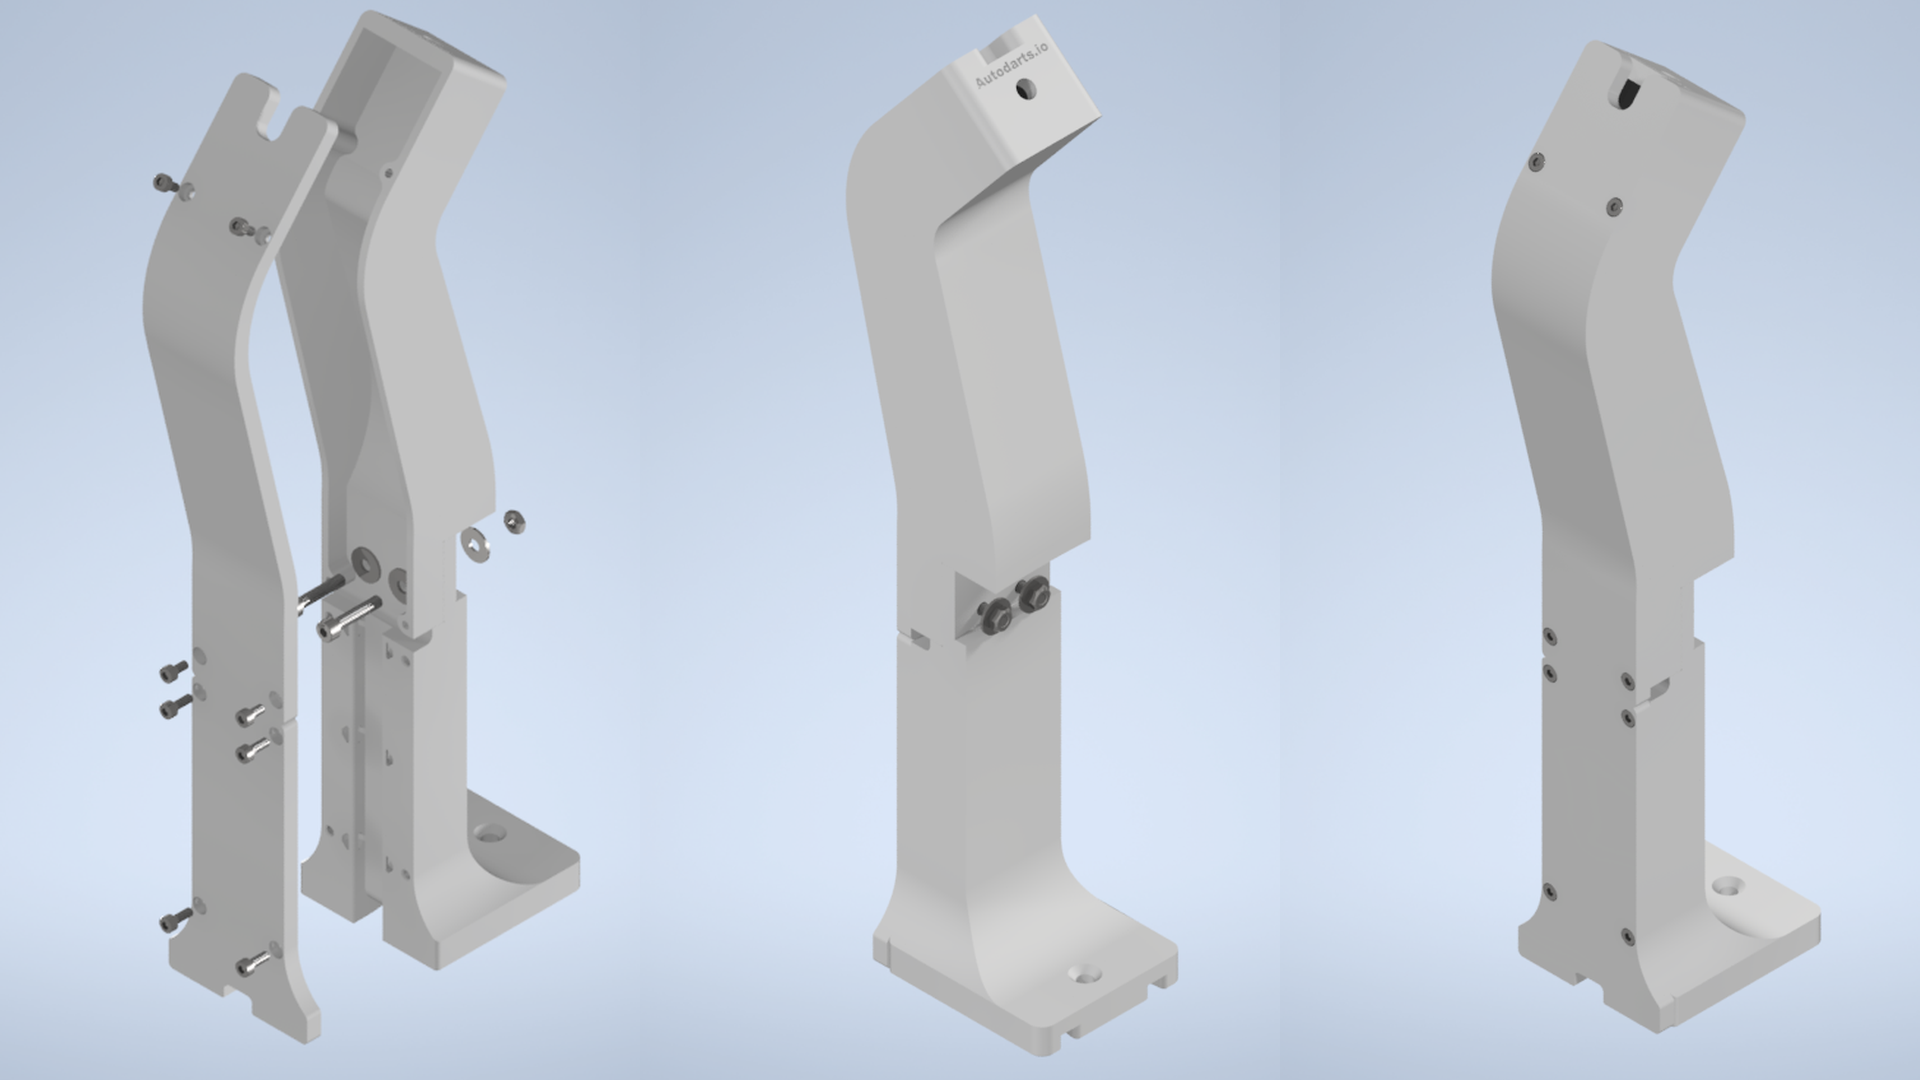
This is the original design of the Autodarts arms. It is only compatible with 32x32mm modules.
Downloads:
For standard webcams with a camera mount thread, you can use the following arms.
Downloads:
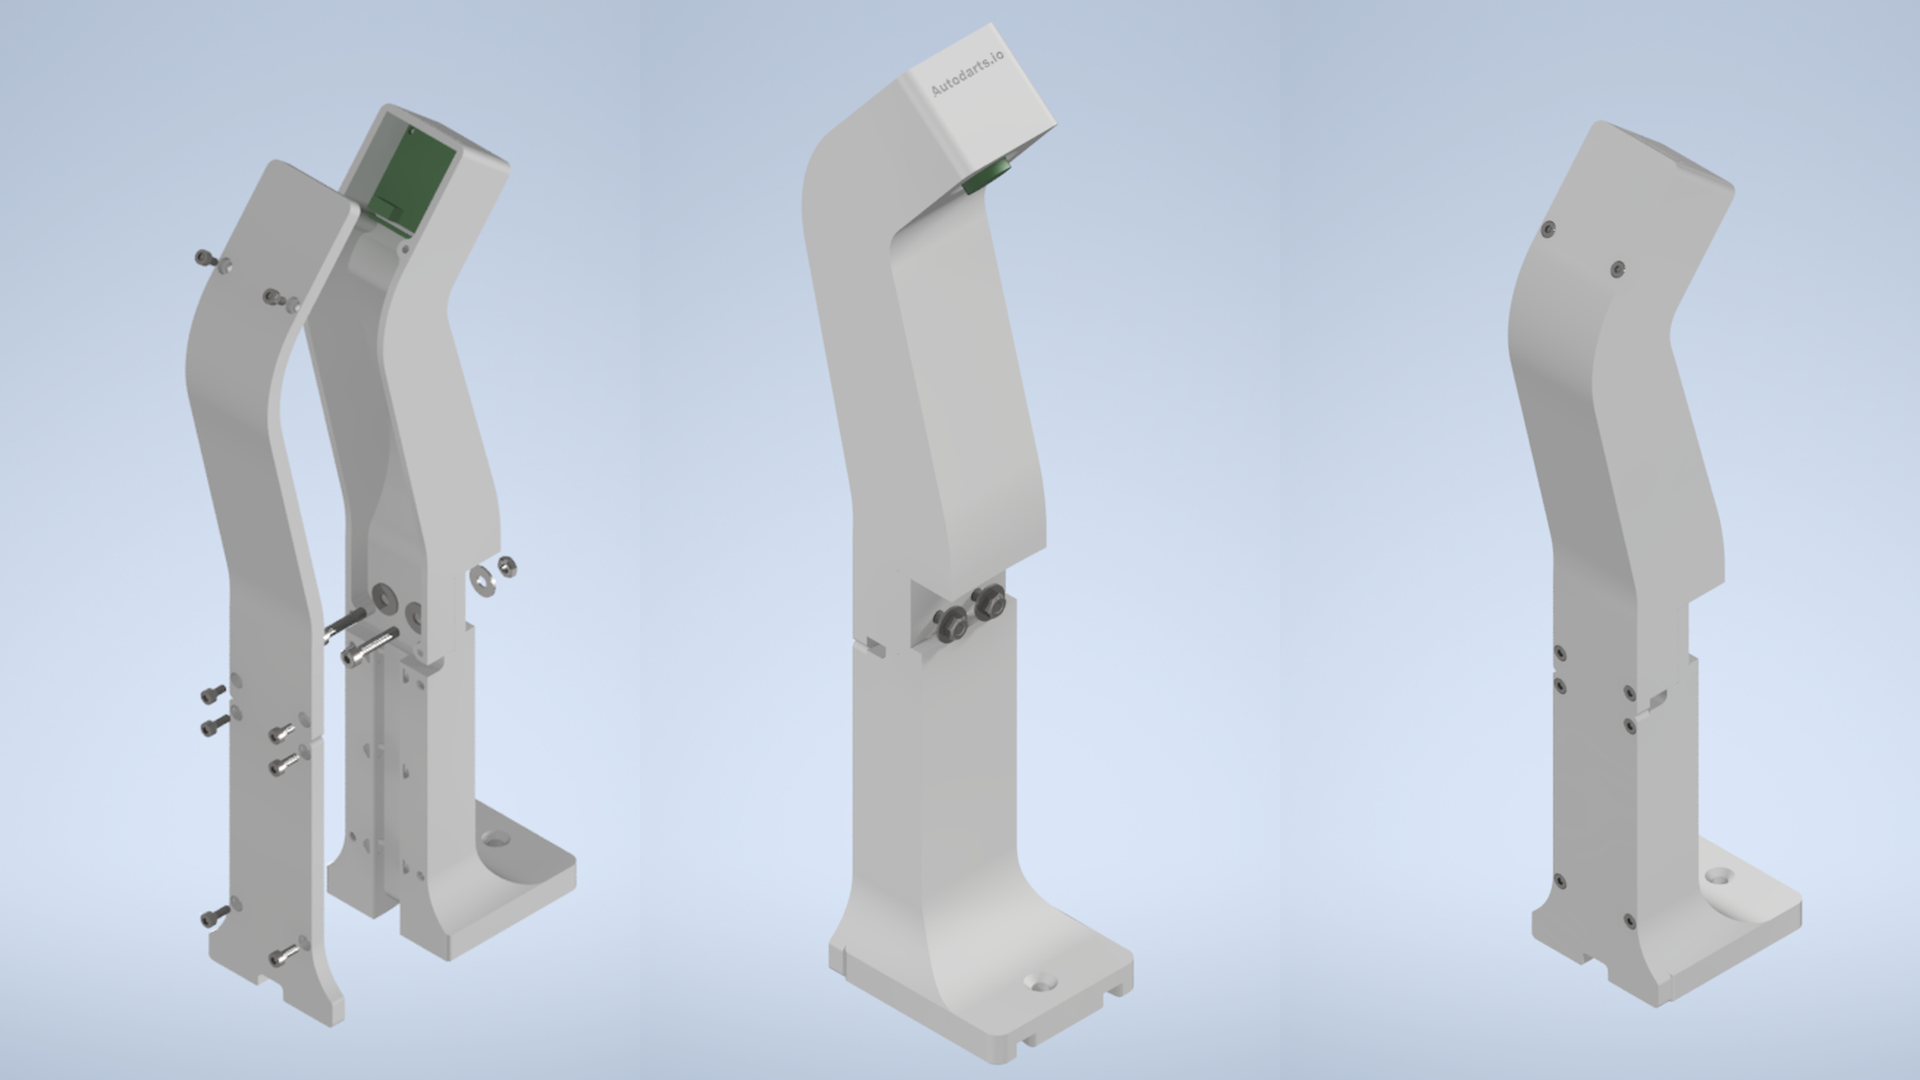
To make the design a little bit more flexible, there is also a modular version of the arm that does not have a fixed head.
Downloads:
For these kinds of modules, you can use the modular arm and the following head.
Downloads:
If you have purchased the Moertek MC920 webcams, you can disassemble them and house their modules in this modular head.
Downloads:
For the Winmau Plasma Light, there are also alternative feet that you can 3D-print. The feet feature channels for the cables of the camera modules. It makes for a neater setup.
Downloads:
You will have to purchase the following hardware:
- 1x Winmau Plasma Light
- 3x compatible camera modules
You will need to print the following models:
- 3x arms
- 3x arm lids
- 3x modular heads (when using modular arm)
- 3x modular head lids (when using modular arm)
- 3x feet
- 3x feet lids
Screws, nuts, and washers:
- 12x DIN 4762 M2x10 screws (mounting camera modules inside the arm or modular head)
- 6x DIN 4762 M4x20 screws (mounting arm and feet to the ring)
- 6x DIN 4762 M4x12 screws (mounting head to the modular arm)
- 12x DIN 9021 M4 washers
- 12x DIN 4032 M4 nuts
- 12x DIN 4762 M3x8 screws (mounting the lids)
- 3x DIN 7997 5x40 screws (mounting the feet to the wall)
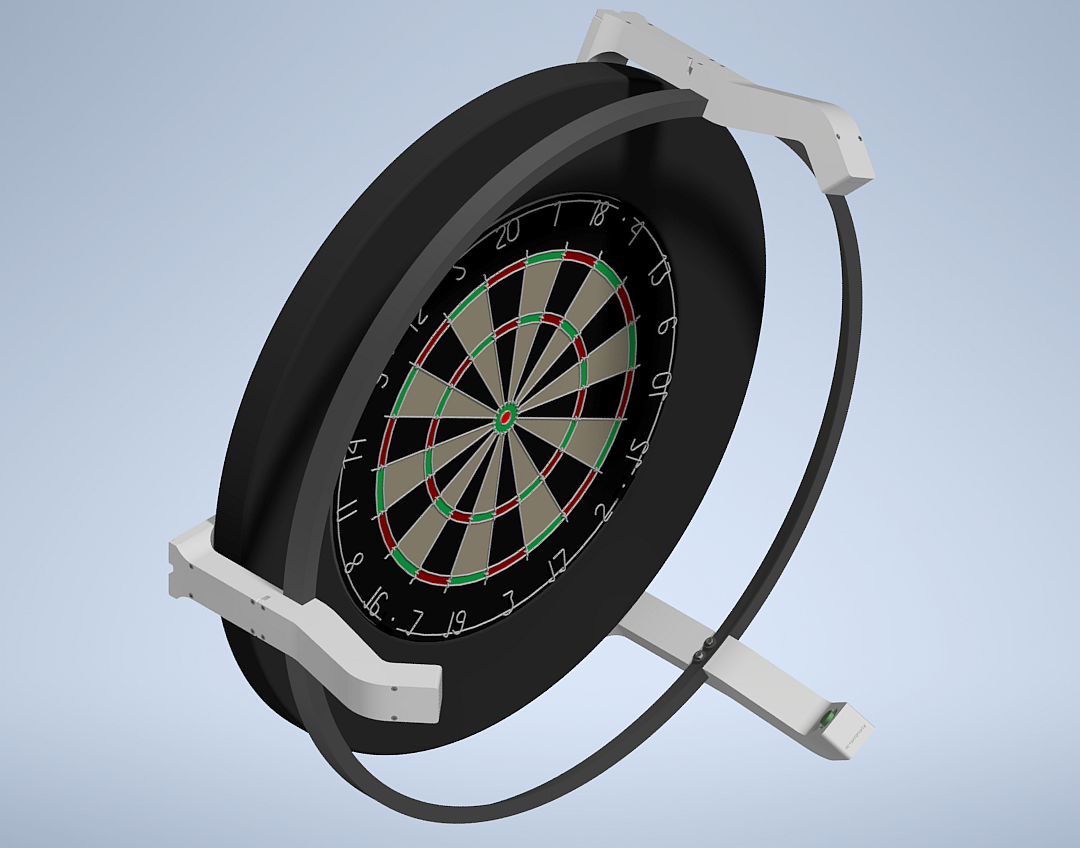
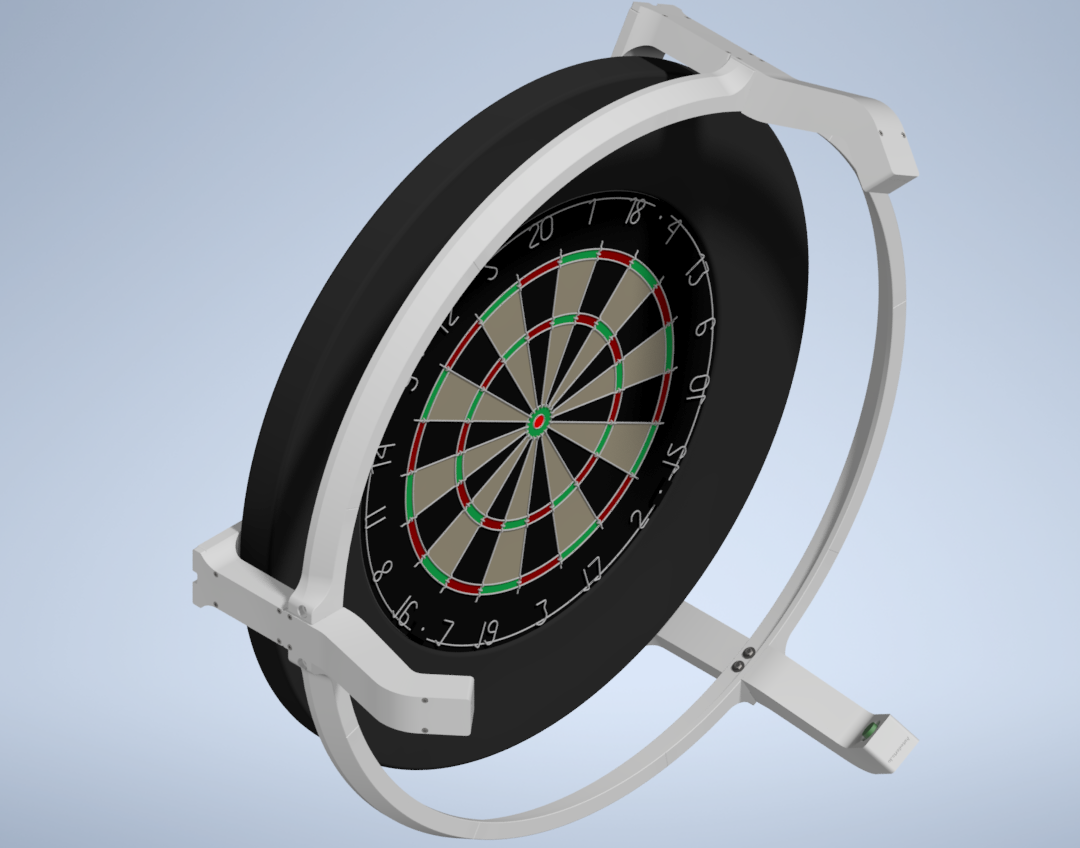
@Lars has also provided a complete 3D LED ring that you can entirely 3D-print.
The design is completely compatible with all arms mentioned above, so you can combine this ring with any of the arms, including the modular arm.
The feet for the Winmau Plasma Light from above are not compatible with this ring.
Make sure to print the feet that are linked further down.
A complete setup may look like this.
In addition to the arms from above, you will need to print the pieces that make up the ring.
- 3x ring_foot.stl
- 6x ring_element.stl
- 2x ring_mount.stl
- 1x ring_mount_cable.stl or ring_mount_cable_groove.stl
In addition to the 3D-prinable pieces, you will need to purchase:
Screws, nuts, and washers are the same as for the Winmau Plasma Light setup.
If you want to design your own modular head, you can use the following step file as a basis.
Downloads: